Fed up with Joy-Con Drift? Sending your Joy-Con in to Nintendo so they can repair them is the best bet but there can be an extra charge and there is the waiting time as well. If you are adept with a screwdriver and like to tinker with electronics, you can actually repair Joy-Con drift by replacing the joystick yourself. In this video guide, we’ll show you how to take a Joy-Con apart and replace that faulty Joy-Con with a brand spanking new one!

First and foremost, you will need a Joy-Con Joystick repair kit. You can purchase these on Amazon for around 15 dollars/euros and they will normally come with two Joystick replacement parts. Alternatively, you can pay a little extra for four joystick parts but it will cost you a few euros more.
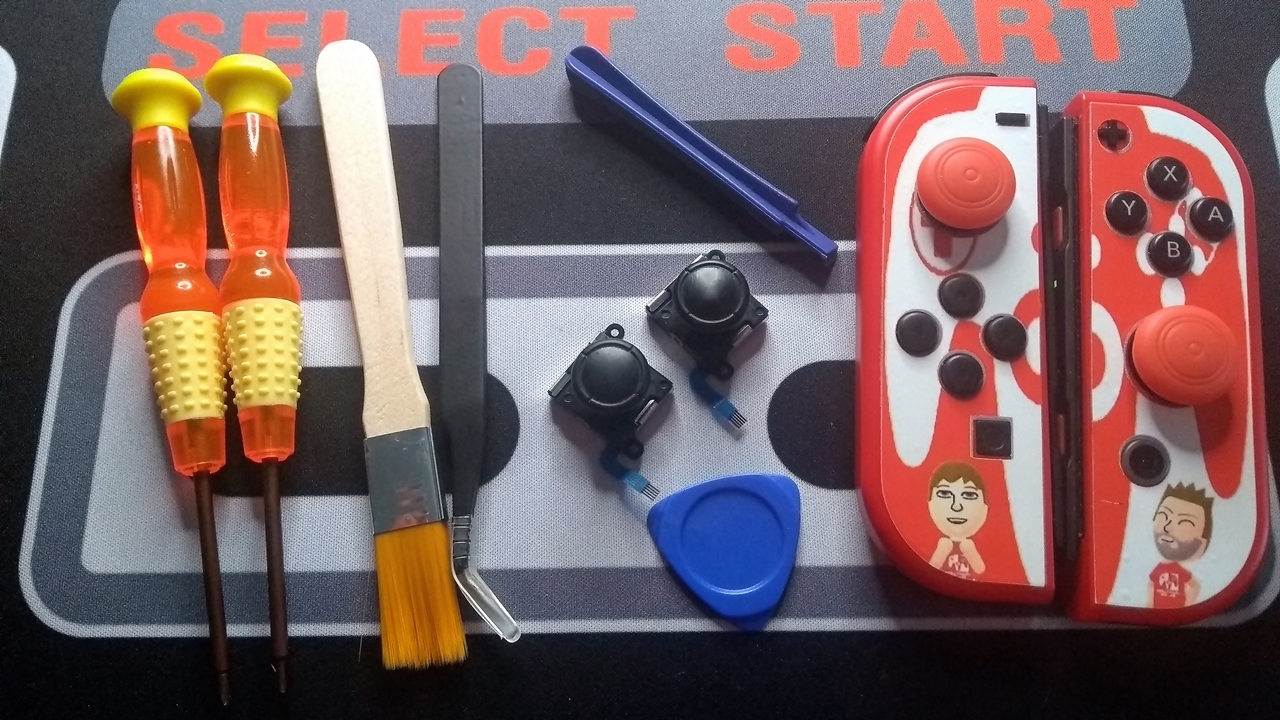
The majority of the kits come with the following parts and tools:
- ‘Y’ Screwdriver
- ‘+’ Screwdriver
- Tweezers
- Lever
- Brush
- Triangle Plectrum
- Replacement Joysticks
- Replacement Screws
- Silicone suction cup
Some kits can include other accessories like colored thumb grips but they are not essential in changing a joystick. They are more like cosmetic extras that allow you to customize your Joy-Con.
In the video below, I will take you through the process of taking a Joy-Con apart and replacing the Joystick. This is a very fiddly process and only attempt to repair your own Joy-Con if you have some technical know-how and a delicate touch. Being rough-handed while attempting to repair a Joy-Con can lead to permanent damage to the fragile electronic parts inside.
We hope our video guide helps you in repairing your own Nintendo Switch Joy-Con. Another great video that can take you through the joystick replacement process is one created by iFixit on YouTube. If you have any doubts beforehand, do not start taking your Joy-Con apart. Instead, get it sent to Nintendo so you will at least have a guaranteed repair.
Share this:

Discover more from
Subscribe to get the latest posts sent to your email.